Are you tired of dealing with faulty headlights on your Bad Boy Buggy? Do you want to take control of the situation and fix the problem yourself? We understand that it is a headache to take trips to your mechanic for such small repairs and that’s why we want to help you take good care of your headlights yourself.
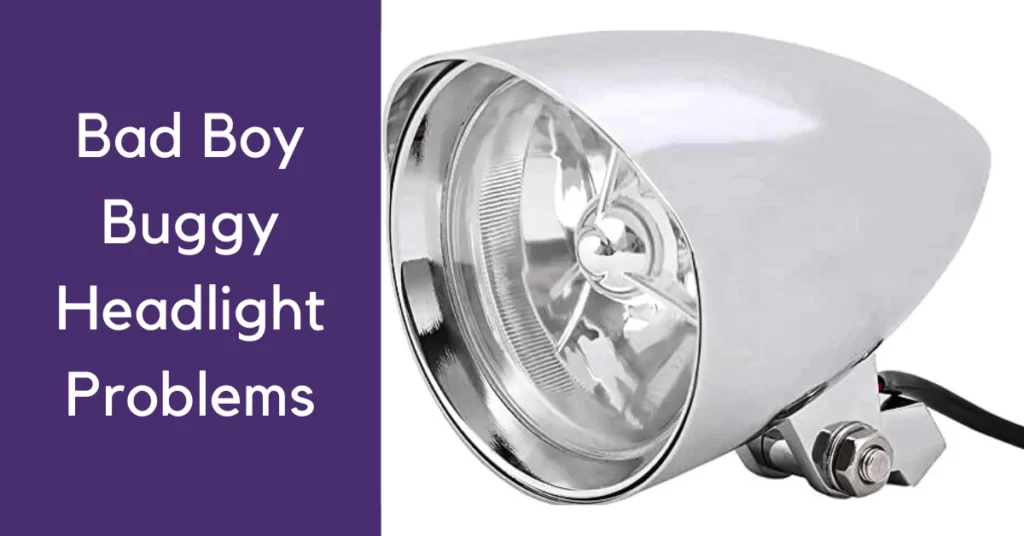
Top 6 Bad Boy Buggy Headlight Problems
In this article, we will guide you through the top 6 Bad Boy Buggy headlight problems and provide you with step-by-step solutions to help you get back on the road in no time.
With our guide, you’ll be able to identify and solve common headlight problems in a matter of minutes. So, grab your tools and let’s get started!
#1. Flickering Problem In Bad Boy Buggy Headlights
What Is It?
Bad boy buggy headlight problems refer to the recurring issue of flickering lights in the vehicle’s headlights. This problem occurs when the headlights intermittently dim or flash, causing visibility concerns for the driver.
What Causes Flickering In Bad Boy Buggy Headlights?
- Loose electrical connections
- Faulty voltage regulator
How to fix Flickering issues in bad boy buggy headlights?
Solution For Loose Electrical Connections –
- Turn off the Bad Boy Buggy and remove the key from the ignition.
- Open the hood of the buggy and locate the headlights.
- Inspect the wiring connections for the headlights, including the connectors and terminals.
- If you find any loose or disconnected wires, gently reattach them to their respective connectors.
- Ensure that all connections are secure and tightly fastened.
- Close the hood and turn on the buggy to check if the flickering problem is resolved. If not, proceed to the next step.
Solution For Faulty Voltage Regulator –
- Turn off the Bad Boy Buggy and remove the key from the ignition.
- Open the hood of the buggy and locate the voltage regulator. It is usually mounted near the battery or the engine.
- Inspect the voltage regulator for any signs of damage or loose connections.
- If you notice any loose or disconnected wires, gently reattach them to their respective connectors.
- If the voltage regulator appears damaged or worn out, it may need to be replaced. Refer to the manufacturer’s instructions or consult a professional technician for guidance.
- Close the hood and turn on the buggy to check if the flickering problem is resolved. If the issue persists, it is recommended to seek further assistance from a qualified technician or contact the Bad Boy Buggy customer support for troubleshooting guidance.
#2. Headlight Bulb Burnout Issue in Bad Boy Buggy
What Is It?
One common issue that Bad Boy Buggy owners may encounter is headlight bulb burnout. These Bad Boy Buggy Headlight Problems can occur due to various reasons, such as long-term usage, faulty wiring, or even environmental factors.
What Causes bulb burnout in bad boy buggy headlights?
- Poor quality bulbs
- Overvoltage or electrical issues
How to fix headlight bulb burnout in bad boy buggy?
Solution For Poor Quality Bulbs –
- Remove the burnt-out bulb from the headlight assembly. This typically involves accessing the back of the headlight assembly and twisting the bulb counterclockwise to release it.
- Inspect the bulb for any signs of damage or poor quality. Look for any discoloration, corrosion, or loose connections. Poorly manufactured bulbs may have these defects.
- Replace the poor quality bulb with a new, high-quality bulb. Ensure that the new bulb is compatible with your bad boy buggy’s headlight assembly. Consult the vehicle’s manual or a knowledgeable technician if unsure.
- Install the new bulb by inserting it into the headlight assembly and twisting it clockwise to secure it in place.
- Test the new bulb by turning on the headlights. Verify that it illuminates properly without flickering or dimming. If the problem persists, proceed to the next step.
Solution For Overvoltage or Electrical Issues –
- Check the voltage of your bad boy buggy’s electrical system. Use a voltmeter to measure the voltage at the battery terminals or consult a technician if you’re unsure how to do this.
- If the voltage exceeds the recommended range for your vehicle’s electrical system, it may be necessary to install a voltage regulator or stabilizer. This device will help regulate the voltage and prevent overvoltage issues.
- Inspect the wiring and connections related to the headlights. Look for any loose, damaged, or corroded wires or connectors. Ensure that all connections are secure and free from debris.
- Repair or replace any faulty wiring or connectors found during the inspection. This may involve soldering or crimping new connections or replacing damaged components.
- Test the headlights again to see if the overvoltage or electrical issues have been resolved. If the problem persists, it is recommended to consult a professional technician who specializes in bad boy buggies or automotive electrical systems.
#3. Water leakage problem in bad boy buggy
What Is It?
Bad Boy Buggy Headlight Problems can include water leakage, which can be a major concern. When water seeps into the headlights, it can cause electrical issues, reduced visibility, and even potential damage to the vehicle.
What Causes water leakage in bad boy buggy headlights?
- Faulty seals or gaskets
- Cracked or damaged headlight housing
How To Fix Water Leakage In Bad Boy Buggy Headlights?
Guide
Step 1 –
Identify the source of the water leakage in the bad boy buggy headlights. This can be done by observing where the water is entering the housing or by conducting a water leakage test.
Step 2 –
Check the seals or gaskets around the headlight housing. Faulty seals or gaskets can allow water to enter the headlights. Inspect them for any signs of damage, wear, or misalignment. If any issues are found, proceed to step 3.
Step 3 –
Replace the faulty seals or gaskets. This may involve removing the headlight housing and carefully replacing the damaged seals or gaskets with new ones. Ensure that the new seals or gaskets are of the correct size and type for the specific headlight housing.
Step 4 –
Test the headlights for water leakage after replacing the seals or gaskets. This can be done by spraying water onto the headlights or driving the bad boy buggy in wet conditions. Check if water is still entering the housing. If the problem persists, proceed to step 5.
Step 5 –
Inspect the headlight housing for cracks or damage. Cracked or damaged housing can allow water to seep into the headlights. Carefully examine the housing for any visible cracks, holes, or other signs of damage. If any issues are found, proceed to step 6.
Step 6 –
Repair or replace the cracked or damaged headlight housing. Depending on the extent of the damage, you may either attempt to repair the housing using appropriate methods such as epoxy or adhesive or replace the entire housing if necessary.
#4. Poor beam focus in bad boy buggy
What Is It?
One common issue that plagues the Bad Boy Buggy headlights is the poor beam focus problem. This problem affects the functionality of the headlights, causing them to emit unfocused beams of light.
What Causes poor beam focus in bad boy buggy?
- Misaligned Headlight Bulbs
- Damaged or Foggy Headlight Lenses
How to fix poor beam focus in bad boy buggy?
Solution For Misaligned Headlight Bulbs –
- Park your Bad Boy Buggy on a level surface facing a wall or garage door.
- Turn on the headlights and observe the beam pattern on the wall.
- If the beam pattern appears misaligned or uneven, locate the adjustment screws on the back of the headlight assembly. These screws are usually accessible from the engine bay or behind the front grille.
- Use a screwdriver or socket wrench to adjust the screws. Typically, turning the screws clockwise will lower the beam, while turning them counterclockwise will raise the beam. Adjust the screws incrementally and check the beam pattern after each adjustment until it is properly aligned.
Solution For Damaged or Foggy Headlight Lenses –
- Inspect the headlight lenses for any visible damage such as cracks or holes. If there are any major damages, the lenses may need to be replaced.
- For foggy lenses, there are a few methods to restore clarity:
- a) Clean the lenses thoroughly with a mild soap and water solution. Use a soft cloth or sponge to gently scrub away any dirt or grime. Rinse with clean water and dry.
- b) Apply a headlight restoration kit, which can be purchased from an auto parts store. These kits typically include sandpaper, polishing compound, and a sealant. Follow the instructions provided with the kit for proper usage.
- c) Another option is to use toothpaste as a DIY restoration method. Apply a small amount of toothpaste to a soft cloth and rub it onto the lens in circular motions. Rinse with water and dry.
#5. Bad Boy Buggy Headlight Switch Failure
What Is It?
One common issue with Bad Boy Buggy headlights is the failure of the headlight switch. Bad Boy Buggy Headlight Problems can arise when the switch stops functioning properly, resulting in no headlights or an inability to toggle between high and low beams.
What Causes headlight switch failure in bad boy buggy?
- Electrical Overload
- Wear and Tear
How to fix headlight switch failure in bad boy buggy?
Solution For Electrical Overload –
- Ensure the buggy is turned off and disconnect the battery cables to prevent any electrical shock or damage.
- Check for any signs of melted or damaged wiring. Look for loose connections or burnt terminals. If any issues are found, repair or replace the affected wiring.
- Locate the fuse box and inspect the fuses related to the headlights. If any fuses are blown, replace them with new ones of the same rating.
- Use a multimeter to test the continuity of the headlight switch. If the switch does not show continuity when activated, it may need to be replaced.
Solution For Wear and Tear –
- As a safety precaution, disconnect the battery cables to avoid any electrical hazards.
- Depending on the buggy model, the switch may be located on the dashboard or steering column. Carefully remove the switch by unscrewing or unclipping it from its mounting location.
- Check for any signs of wear or damage on the switch, such as loose or broken connections, worn-out contacts, or corrosion. If the switch is damaged, it will need to be replaced.
- Purchase a replacement headlight switch that matches the specifications of the original switch. Connect the new switch to the wiring harness and secure it in place according to the manufacturer’s instructions.
- Reconnect the battery cables and test the headlights to ensure they are functioning properly with the new switch installed.
#6. Bad Boy Buggy Headlight Wiring Problems
What Is It?
If you’re experiencing Bad Boy Buggy headlight problems, you might be facing a headlight wiring issue. This can manifest as flickering lights, dim illumination, or even complete headlight failure.
What Causes headlight wiring problems in bad boy buggy?
- Corrosion
- Loose or damaged wiring connections
How to fix headlight wiring problems in bad boy buggy?
Solution For Corrosion –
- Depending on the model of the bad boy buggy, the headlight wiring connections are typically located behind the front grille or within the headlight housing. Remove any covers or panels to access the wiring connections.
- Examine the wiring connections for any signs of corrosion, such as greenish or white powdery residue. Corrosion can cause poor electrical conductivity and must be removed.
- Use a wire brush to gently scrub away the corrosion from the wiring connections. Be careful not to damage the wires while cleaning. Ensure all corrosion is removed from both the male and female connectors.
- Spray electrical contact cleaner onto the cleaned connections to remove any remaining residue. Allow it to evaporate completely before proceeding.
Solution For Loose or damaged wiring connections –
- Check all wiring connections for any signs of loose or damaged wires, frayed insulation, or loose connectors. Ensure all connections are securely fastened.
- Use a screwdriver to tighten any loose screws or connectors. Ensure they are snug but not over-tightened to avoid damaging the connections.
- If you find any damaged wires with frayed insulation, cut away the damaged section using wire cutters/strippers. Strip a small portion of the wire’s insulation to expose fresh copper. Twist the exposed wire ends together and secure with a wire connector. Wrap the connection with electrical tape for added insulation and protection.
- Once you have cleaned corroded connections and repaired any loose or damaged wiring, use a multimeter to test the electrical connections. Check for proper voltage and continuity to ensure the headlights are receiving power correctly.
- After confirming the wiring problem is resolved, reassemble any panels or covers that were removed during the process.
- Turn on the bad boy buggy and verify that the headlights are functioning properly. If they still do not work, further troubleshooting may be required, such as checking the fuses or relays related to the headlights.
Conclusion
In conclusion, addressing Bad Boy Buggy headlight problems is essential for a safer and more efficient off-road experience. Whether it’s dim or malfunctioning headlights, taking prompt action and conducting regular maintenance can enhance visibility during nighttime rides.
Identifying and resolving potential causes like wiring issues or bulb defects ensures a trouble-free adventure on rough terrains. By keeping the headlights in optimal condition, owners can navigate confidently and enjoy their Bad Boy Buggy to the fullest.
Headlight Problems in Other Car Models
- Silverado passenger headlight not working
- Chevy traverse headlight problems
- 2015 GMC Sierra headlight problems
- GQ Patrol Headlight Problems
Frequently Asked Questions
What are some signs that indicate a bad headlight on a Bad Boy Buggy?
If you notice that your headlights are dimming or flickering, or if one or both of them stop working altogether, it could indicate a bad headlight on your Bad Boy Buggy, but it could also mean that other components such as the battery or the alternator may not be functioning optimally.
How often should the headlights on a Bad Boy Buggy be inspected and maintained?
You should inspect and maintain the headlights on your Bad Boy Buggy regularly, at least once every few months. Don’t wait until they go out or start flickering; stay on top of it to avoid problems down the road.
What is the average cost to have a professional diagnose and repair a Bad Boy Buggy headlight problem?
A professional will diagnose and repair it for an average cost of around $100-$200. However, this may vary depending on the severity of the damage caused.